

The way we connect to mobile networks is rapidly evolving. Traditional physical SIM cards are now being replaced by eSIMs, or embedded SIMs. They’re smaller, smarter, and enable instant activation without switching hardware. But many users still wonder — how does eSIM setup work? Or, how do I complete an eSIM installation on my device?
This detailed guide explains every step of the eSIM setup and installation process, making it easy for you to switch to a smarter, more flexible way to stay connected.
What is eSIM and Why It’s the Future
An eSIM (embedded SIM) is a programmable chip built into your phone, tablet, or smartwatch. It eliminates the need to physically insert a SIM card. With eSIM, switching networks, activating data plans, or traveling internationally becomes seamless.
Key Benefits of eSIM Installation:
- No physical SIM swapping
- Multiple network profiles on one device
- Instant activation via QR code or app
- Ideal for travelers, remote workers, and dual-SIM users
eSIM Setup: Compatible Devices and Requirements
Before beginning your eSIM setup, check whether your device is compatible. Most newer smartphones, tablets, and smartwatches now support eSIM technology.
Popular Devices that Support eSIM Installation:
- iPhone 11 and newer models
- Google Pixel 3 and above
- Samsung Galaxy S20 series onward
- iPads with cellular capabilities
- Apple Watch (Cellular models)
Ensure your device is unlocked and your carrier supports eSIM activation in your region.
Step-by-Step eSIM Installation Process
Here’s a universal guide to get your eSIM installed on any supported smartphone or device. The process may slightly vary depending on your device and provider.
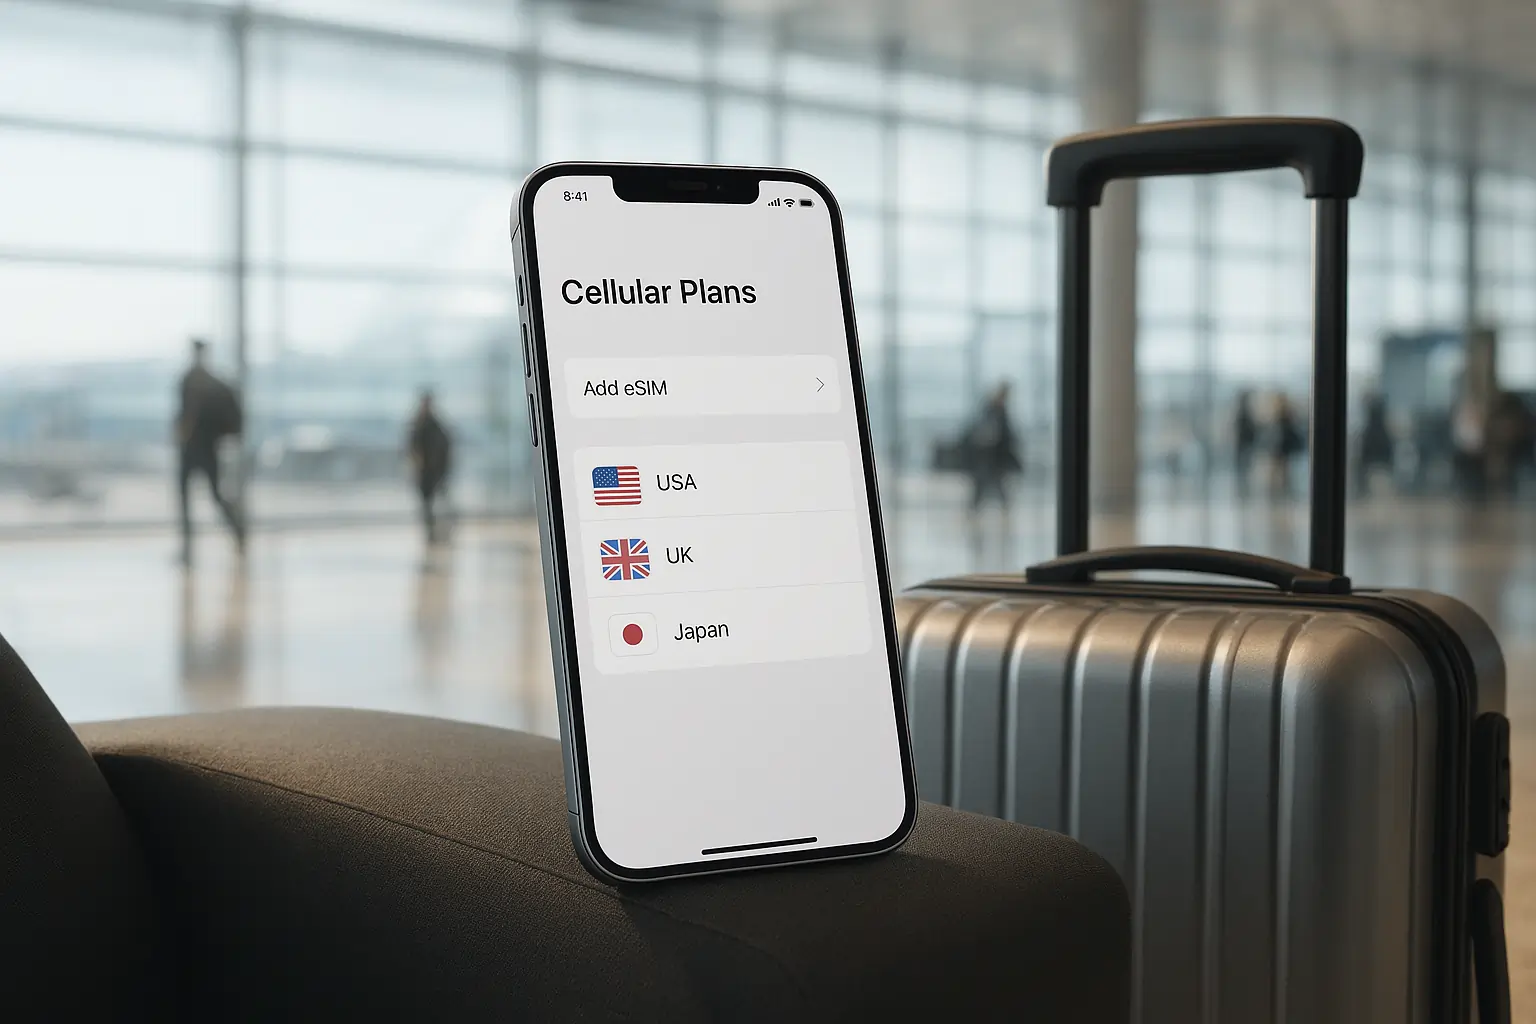
1. Choose Your eSIM Provider
You’ll first need an eSIM-compatible data plan. Providers now offer instant QR codes, manual activation codes, or eSIM profile downloads via their apps.
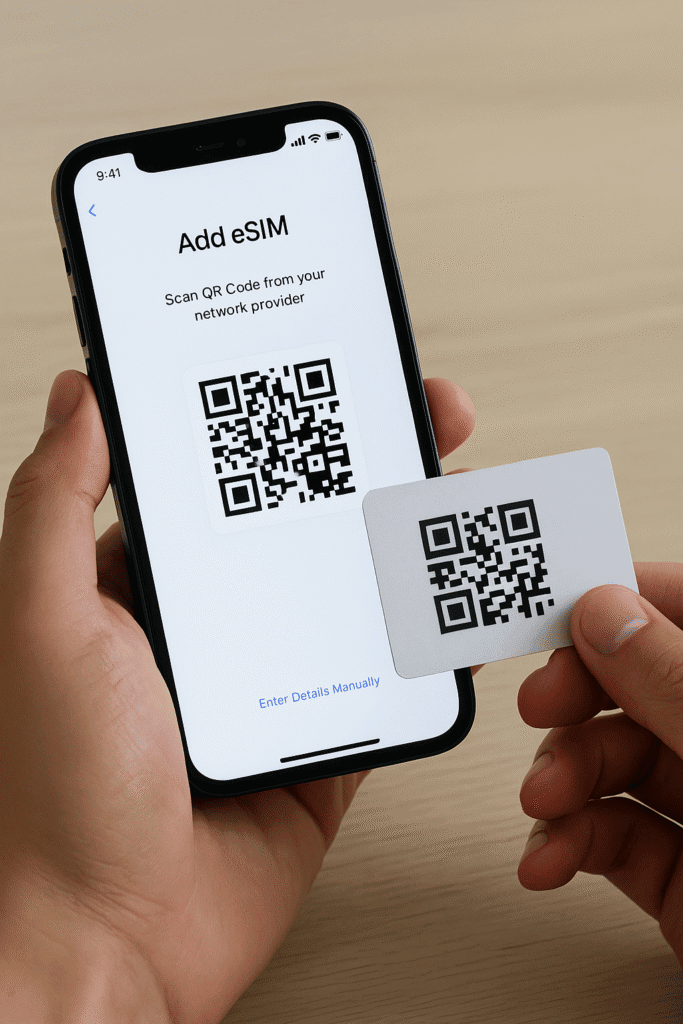
2. Scan QR Code or Enter Details Manually
Once you receive your QR code:
- Go to Settings > Mobile Network or Cellular
- Tap Add eSIM or Add Mobile Plan
- Scan the QR code or enter the activation code
3. Complete Activation and Set Preferences
- Label your plan (e.g., “Travel Data”)
- Set the default line for data, voice, or SMS
- Enable roaming if required
The eSIM setup process usually completes in a few minutes. You’re now ready to use your new connection.
Troubleshooting Common eSIM Installation Issues
While most installations are smooth, users sometimes run into issues. Here’s how to fix them:
Issue 1: QR Code Not Scanning
Make sure the camera lens is clean and that the code is printed or displayed clearly. Try entering the code manually.
Issue 2: eSIM Profile Not Installing
Ensure you’re connected to Wi-Fi. Restart the device and try again. Some carriers may require a secondary verification step.
Issue 3: No Signal or Data
Double-check that your eSIM is set as the active mobile plan. Reboot your phone or update carrier settings.
How to Install eSIM on Wearables and Tablets
Wearables like Apple Watch and tablets like iPad follow a slightly different eSIM setup route:
- Apple Watch: Use the Watch app on iPhone > Mobile Data > Add Plan
- iPad: Go to Settings > Mobile Data > Add Data Plan
Be sure to follow your provider’s specific installation instructions.
Best Practices for Managing Multiple eSIM Profiles
Most devices allow multiple eSIM profiles, but only one can be active at a time (in many phones). This is great for frequent travelers or remote workers.
Tips:
- Use descriptive labels for each profile
- Switch data plans from settings with a single tap
- Disable profiles you aren’t currently using to save battery
Want to Save on Your eSIM Plans?
Before you activate your next eSIM, explore exclusive travel eSIM deals we’ve collected for every region and device type.
Visit our homepage at TraveleSIM Deals to compare providers, get discount coupons, and activate within minutes.
Final Thoughts: eSIM Setup Simplified for Everyone
With this guide, we hope your transition to eSIM setup and installation feels effortless. Whether you’re a frequent traveler or just tired of juggling physical SIM cards, switching to eSIM is a smart move.
From easy activation steps to troubleshooting tips and access to the best eSIM deals, you now have everything needed to get started.
FAQs: eSIM Setup and Installation
1. How do I set up an eSIM on my smartphone?
To set up an eSIM, go to your phone’s settings > Mobile Network > Add eSIM or Mobile Plan. Then, scan the QR code provided by your carrier or enter the activation code manually. The setup usually completes within minutes.
2. Is eSIM installation different on iPhone and Android?
Yes, the steps slightly vary. On iPhones, go to Settings > Cellular > Add eSIM. On Android devices, it’s usually under Settings > Network & Internet > SIMs or Mobile Network. The basic eSIM installation process remains similar across platforms.
3. Can I use multiple eSIMs on one device?
Yes, most modern devices support multiple eSIM profiles. However, only one or two can be active at a time depending on your device model. This is helpful for users who travel or manage separate business and personal numbers.
4. What should I do if eSIM setup fails?
If your eSIM setup fails, ensure your device is compatible, unlocked, and connected to Wi-Fi. Restart the device, check for software updates, and retry scanning or manual activation. If problems persist, contact your carrier support.
5. Can I switch carriers easily after eSIM installation?
Yes, one of the biggest advantages of eSIM setup is flexibility. You can switch carriers or plans without changing physical SIMs—just delete the old eSIM profile and install the new one provided by your carrier.


Leave a Reply